As requested, I’ve put together a tutorial that leads you through the basic process of creating a storyboard for your projects. This storyboard includes the ability to fill line drawings with images of your selected fabric. I find storyboards to be very helpful and inspiring – it’s so neat to get an idea of what your project will look like, and to pull together the various inspirations for your project. This tutorial uses Adobe Photoshop. If you have Photoshop Elements, it will mostly work, but you will not have a pen tool – I know there are workarounds for that, but I don’t have Elements so I can’t test them! If you need a program, I’d recommend downloading Gimp. Gimp is a free, open source image editor that allows for the use of layers – you must use layers for this tutorial! I tested most of the tutorial in that program, and it works, although some of the tools have different names.
I haven’t assumed any prior Photoshop experience, so this is a detailed tutorial. I am not a Photoshop expert by any means, but I hope my explanations make sense! I really enjoy writing tutorials – it’s so satisfying to my OCD tendencies to list steps!
You can click on the images to make them bigger. Menu commands are in parenthesis.
Begin by starting a new document (FILE–>NEW)
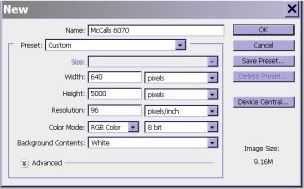
Name it whatever you like – I use the pattern number. Choose the width and height of your blank canvas. I usually go with 640 pixels for the width, as this displays nicely on my blog, and a long length that I will cut off later. Press ok, and you get a screen that looks like this:
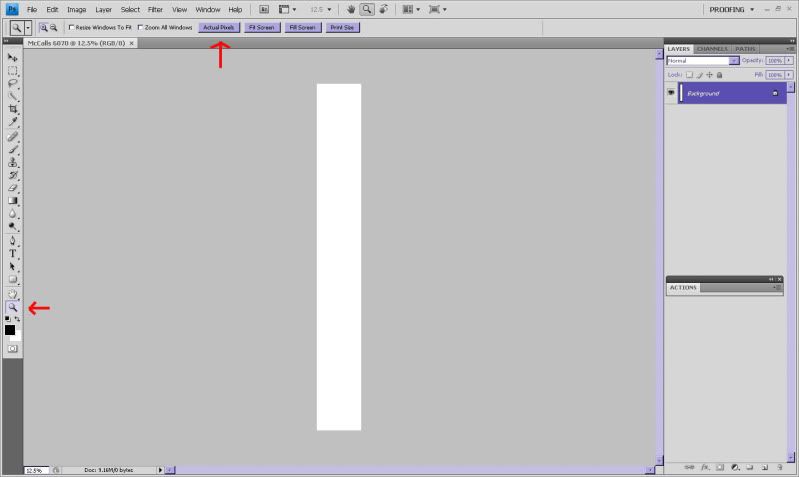
It’s awfully small! Click on the zoom tool (bottom arrow) and then on “Actual pixels” (top arrow) to get a true representation of the size of your canvas. You can also right click on the canvas to select actual pixels. Now you will need to open the images you will be using in this storyboard.
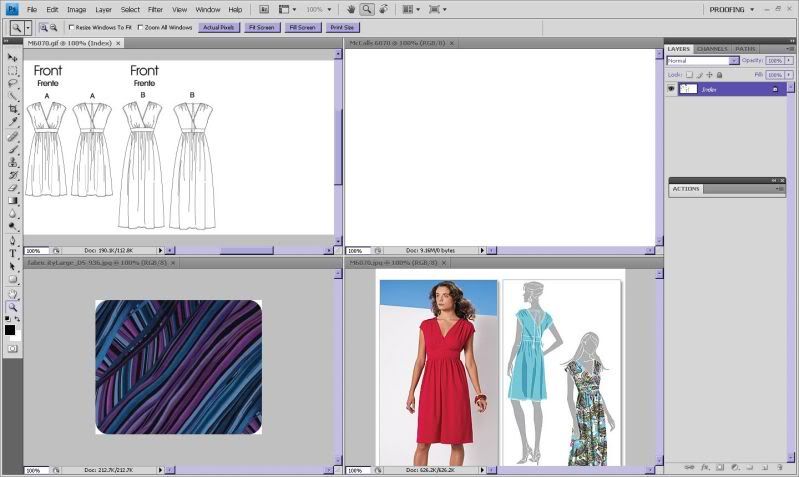
I am using the pattern illustration, the line drawings, and my selected fabric. For McCalls, Butterick, and Vogue, you can get the large images off their website, even the line drawings. I’ve had to look around for Simplicity patterns, since their website has the zoom feature, making saving images difficult. A google image search usually works. You can, of course, scan your envelopes, but my scanner is currently broken! You will want to photograph a fairly large part of your fabric – if the fabric has a large scale, it should look large on the drawing, and small scales should be small. It doesn’t help to have the scale all wrong! You can also scan fabric, but I don’t find that to be a large enough swatch (and, as I said, broken scanner.) I like to give my fabric images rounded edges. You can do it in photoshop, using the rounded rectangle tool and some layers, and I sometimes do, but I find it quicker to use Picnik – it’s free, and I can do a whole batch at once.
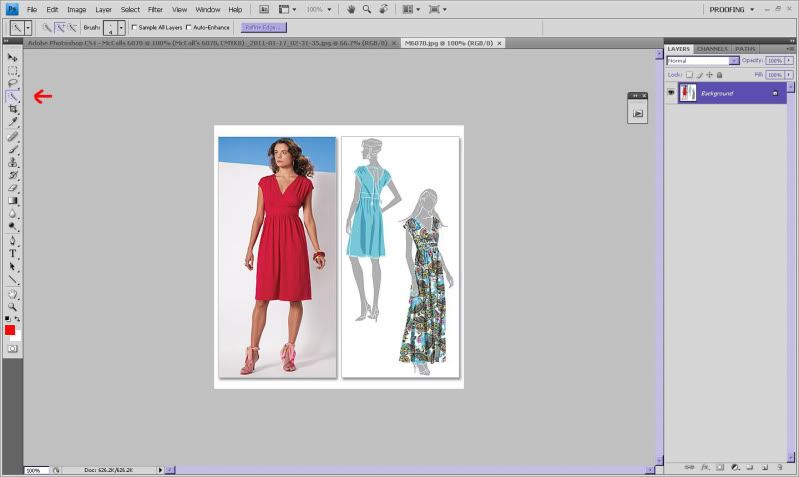
I’m going to use the drawing of the back of the dress for my storyboard, because the tie is my favorite part. Use the quick selection tool (where the arrow in my drawing is pointing) to drag and select the entire area you want to cut. If you accidentally select too much, it’s easy to erase part of the selection by clicking the image of the wand with a minus sign in the toolbar above the image, and then left clicking and dragged to deselect the area. Once you have your image selected, check the selection by clicking the “refine edge” button on the top toolbar.
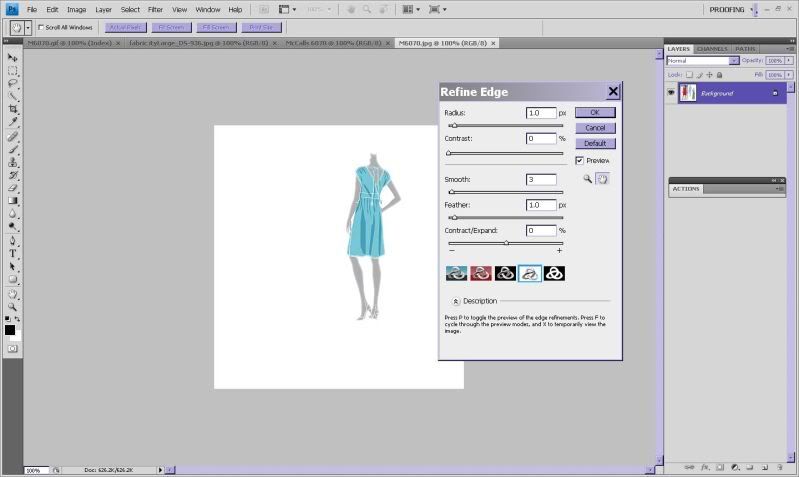
Oops – I forgot to select her head! Go back and fix the selection by hitting cancel. When you are satisfied with your selection, adjust the sliders on the “refine edge” dialog to capture as much as you want. Since I’m putting an image on a white background onto another white background, I will drag the contract/expand slider to the right. If your image is colored, you may need to drag it to the left, or zoom in and delete colored edges around your image. Click ok, and then press CTRL-C to copy the image. Click on the tab that contains your blank canvas, and select paste from the edit menu.
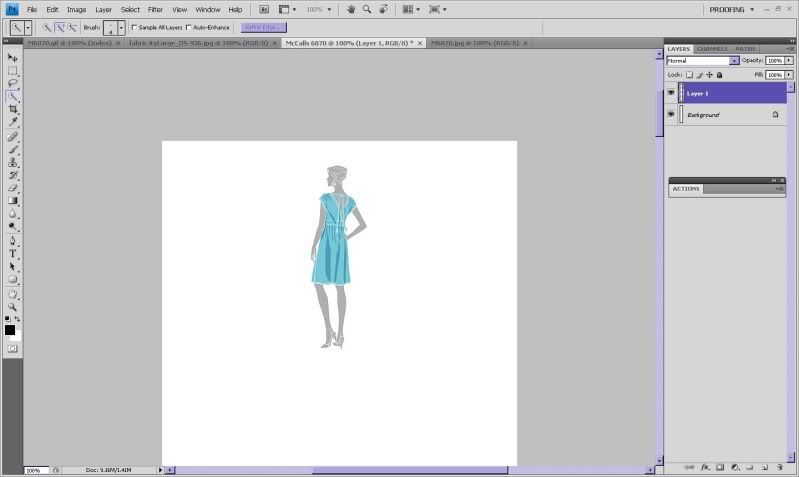
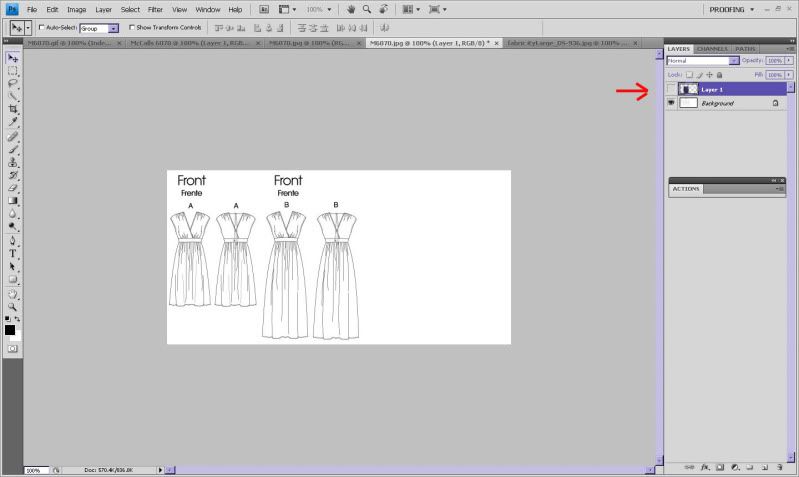
Your first image is now in your storyboard. Notice (by looking at the layer box, to the right) that you have created a new layer, called “layer 1” This layer will only contain this image. If your layer box isn’t open, go to (WINDOWS–>LAYERS) to open the menu. You can use the move tool (the top tool in the toolbar to the left, it looks like a pointer) to move the image where you want it to be.
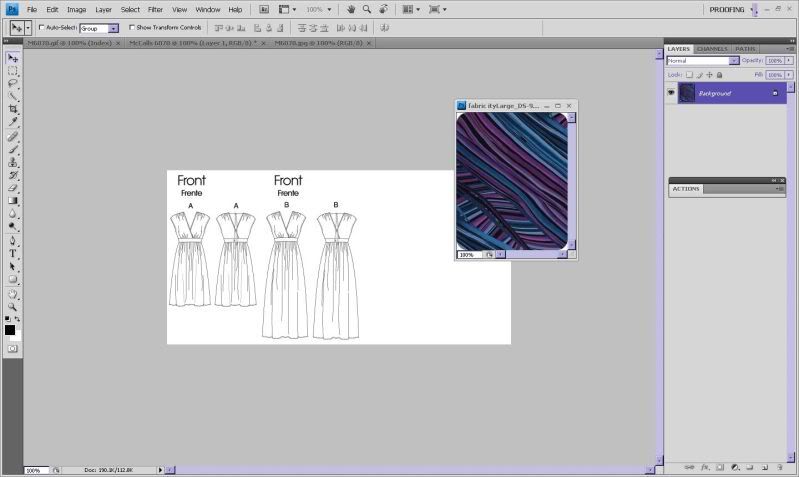
Now we are going to do the fancy bit – coloring in the line drawing with the fabric! First, adjust the size of your fabric image (IMAGE–>IMAGE SIZE) to the size you want – you should try to get the scale of your print (if any) to be close to the scale it will be on your dress. In my case, the scale is slightly too large, but not much. I decide it is close enough, and rotate the image to stand on its head (IMAGE–>IMAGE ROTATION.) Click on the tab that has your fabric image, and drag it out, so that it floats on top. Open your line drawing underneath.
Using the move tool (red arrow in the photo below) drag your fabric image onto your line drawing.
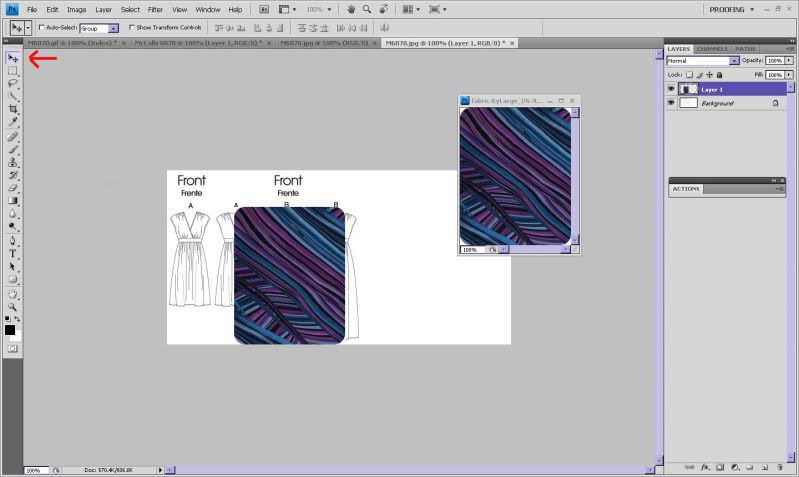
It will create a copy of the image in a new layer. Use the move tool to drag your fabric directly over the line drawing that you wish to color in.
Click the picture of an eye next to “layer 1” in the layer menu – this will hide the layer, and the image will seem to disappear. Make sure that Layer one is still selected.

You are now going to select the pen tool (red arrow above.) This is the tool that Photoshop elements does not have. This tool is called “Paths” in Gimp. The pen tool allows you to select the edges of a region, and creates very smooth curves without any weird jagged edges. Start by clicking on a corner of your line drawing, perhaps the edge of one of the shoulders. This creates an anchor point. Now continue to click around the outline of the dress. Finish by clicking on your starting point again, closing the region. Click the eye next to layer 1 in the layer menu again, to make the fabric image visible. You will see the outline of the dress visible. Right click within the outline, and select “make selection.”
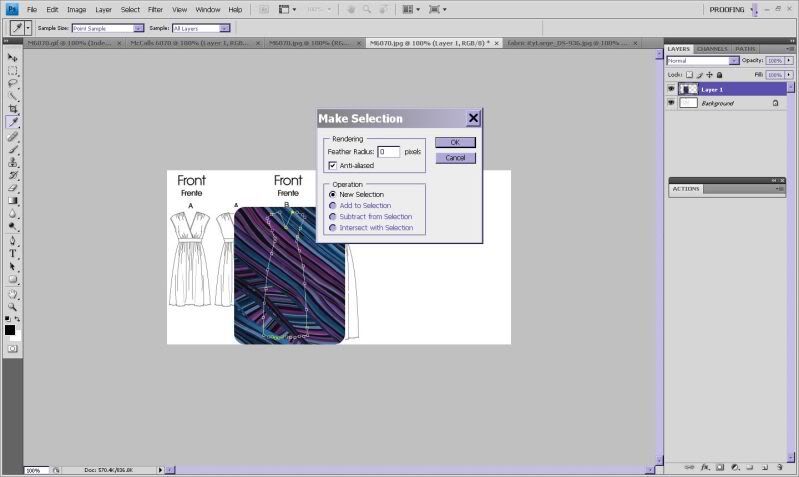
Click ok in the dialog box that appears. You have now selected the region within the dress outline. Now we are going to reverse the selection, and cut it out! Press (CTRL–>SHIFT–>I) all at the same time to reverse the selection. Press the delete key to delete the area around the dress – and you will see that the dress shape has been cut from the fabric image!
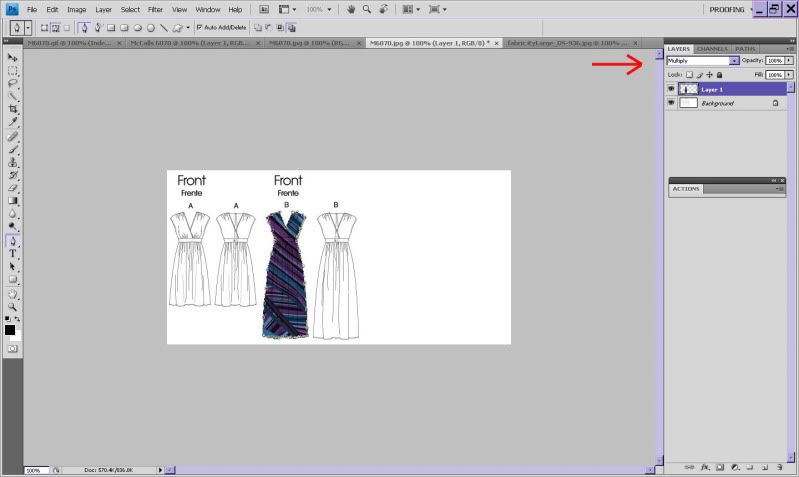
With layer 1 still selected, click the drop down menu at the top of the layer menu (right now it says “normal.”) Select multiply. This will allow the line drawing underneath to show through the fabric (a little hard to see in mine, I know!) You can adjust the opacity of the layer next to the drop down menu, to allow more of the lower layer through if you like. We are done changing the dress color, so go to (LAYER–>FLATTEN IMAGE.) This basically squashes all the layers down on top of each other. Now cut out the colored in dress, using the same steps we used for the first image. Paste the image into your storyboard, and place it where you like using the move tool.
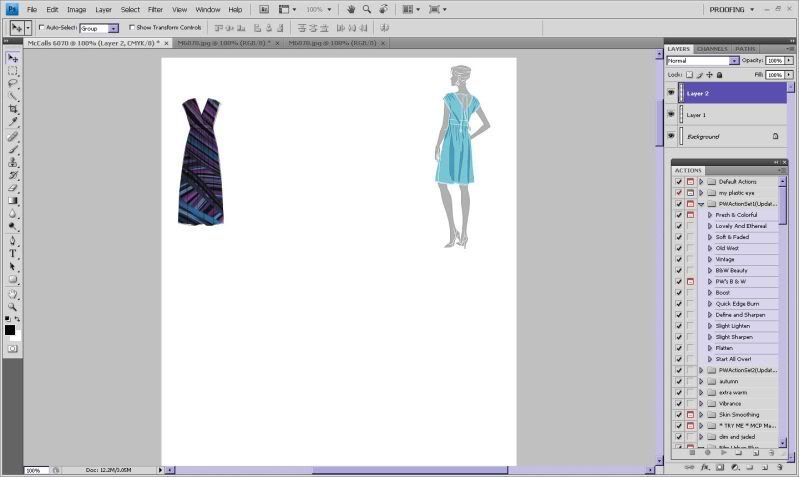
At this point, filling in the rest of your storyboard is up to you! I decided to use my fabric image (I just used the move tool to drag it onto the canvas) and add some text, using the text tool in the left toolbar (bottom arrow below.)
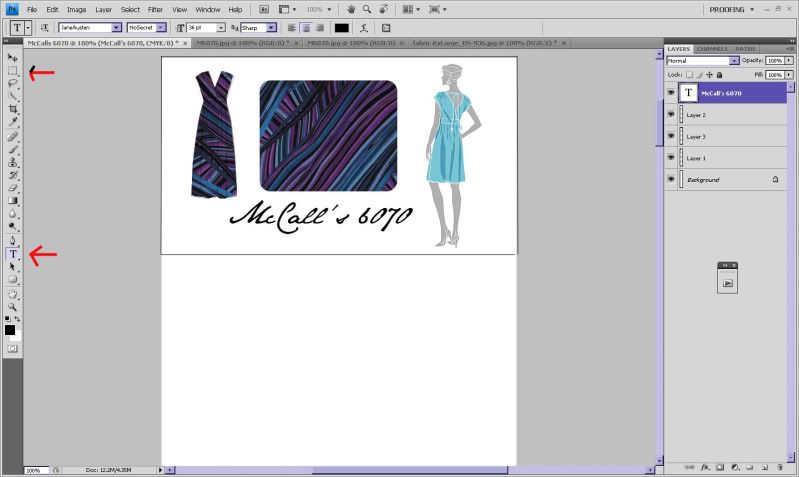
Remember, each element is on a separate layer – be sure to select the one your want to work with! When you are happy with your storyboard, you can cut off the bottom of the canvas using the rectangular marquee tool (top arrow above) and (IMAGE–>CROP.) You will now need to flatten the image – use (LAYER–>FLATTEN IMAGE.) Now that your image is flattened, it is ready to save! You can save it using the file menu. I recommend jpeg format. If you want to use your storyboard online, you may wish to reduce the size of the image. Go to (FILE–>SAVE FOR WEB & DEVICES.)
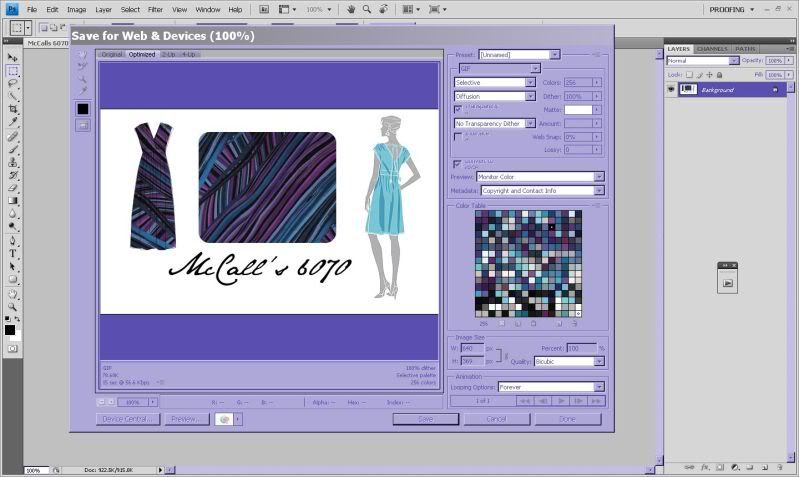
Adjust the image size and compression (I usually use a jpeg, but this screenshot is set to save a GIF.) Save under a different name – don’t replace your original.
And that’s all there is to it! It seems like a lot of steps, but I have tried to include everything. It only takes about 10 minutes to make one of these after the first few tries. And of course, there are lots of creative possibilities for fun storyboards – this is just a basic model. I hope this tutorial helps with your inspiration and project planning!

How interesting! Thank you for so useful information
oh wow! This is super useful! thank you soo much!
This is great thanks! I’ve already downloaded Gimp so I can try it out. 🙂
Thank you SO MUCH for doing this!!!
What a neat idea, and a great tutorial! I don’t have any fancy programs like photoshop, so thanks for suggesting the free downloads.
Great post, I have been playing around with this previously but you have explained it so well, thank you !
This a such a neat idea. Thanks for taking the time to write everything out!
If you select the magic eraser tool in Photoshop (the one with the little star) and click in the white areas of the drawing, it will erase the background (depending on how intricate the drawing is, it might be faster than tracing around the edges), then you can just copy and paste the drawing over the fabric picture and you’ll have the same result, except you’ll aslo have the “inside” lines….
(I’m trying to post an example I just did, but not sure if it will work, it might just be several lines of html coding…)
Excellent tutorial!
You can eliminate a step or two after the point where you select “Multiply”. If you CTRL+left click, i.e. select, the newly edited fabric layer, your marching ants will reappear. You’ve basically re-selected your previously created path. Now with those marching ants still active, select the line drawing and inverse the selection by hitting CTRL+Shift+I. Hit delete. You will have deleted everything in that layer save the outline. Now “Merge” not Flatten the two layers. When you flatten you will create a white background. Merging simply merges the two layers, leaving the transparent background. Now you can repeat the step of drag and drop to the story board.
Also, when you delete using the Marquee tool, it deletes the pixel content, but does not alter the size of the image canvas. As you suggested, use the crop tool to remove/crop your image. The crop tool can be pre-set to your desired size by entering the dimensions in the top options that way you can take the guess work out.
this is great! thank you so much for sharing the info with everyone!!!
Wow…thanks, one of my goals was to learn how to make some nice layouts and this is definitely getting bookmarked and liked. Thanks for taking the time to do this.
What a fabulous tutorial- these are so fun! I just found your blog from Sew Fearless’ Top Five. I’m so glad I clicked over. I would love to link to this if you didn’t mind.