decorating · home repairs · house · rennovation · rennovations

Sewing room update

Painting trim (if you wish to do it correctly!) takes quite a long time.  If taking trim from bare wood, I use 2 full coats of primer (I like Zisser Coverstain) and 2 full coats of paint (I like Behr ultra premium in semi-gloss).  I sand between each coat, and fill all nicks and holes with a good filler (not the cheap DAP stuff) between coats of primer, and caulk between coats of paint.  In the past week I’ve done all that, and now the room is ready for real paint this weekend.  It went from this:

Windows before

to this:

Untitled

the trim in this room was in pretty awful shape – I replaced half of it because whole pieces were missing (the people before us had dogs, and they shredded the trim.)  The windows need to be replaced, but that’s not in the budget right now.  The trim on this floor was originally painted when the house was built, but in the 80s (when everyone wanted natural trim) someone stripped it, and never bothered to finish the wood.  Wood is never the same after paint is stripped anyway, and after 30 years of weather exposure, it was especially bad (not to mention it wasn’t stain grade to start with!)

Anyway, I’m very happy – and now I’m picking paint!  I want a pale blue green, sort of a tiffany blue:
Untitled

This color is scuba green by Benjamin Moore with just a little more white added.  It looks a little strange on the wall, since the purple reflects on it, but it looks great when painted on a swatch or poster board in the room, so I think it’s good!  I may end up just getting the next lighter shade on the card.

It’s important for me to choose a lighter color because I sew at night a lot.  With dark walls, there isn’t enough light in the room.

Speaking of light, I’m replacing this awful ceiling fan:

Old ceiling fan

I hate this thing.  It only takes one light bulb (max 60 watts) so it isn’t useful, and I think the design on the blades looks like evil sheepdogs.

I ordered this replacement from overstock.com:

chandelier

I figure, if you can’t have a chandelier in you sewing room, then where can you?  It takes 4 bulbs, which should be an upgrade.  I have ott lights for ironing and cutting anyway.

I’m still considering my project table options.  I like the idea of using the expedit cubes, but I’m thinking building my own might be better – then I can have the size and height that I want!  For now, I will probably bring my foldable table down and use it while I try to decide on my options.

So, I haven’t done any sewing, but I’ve made great progress on my new space – I am so excited!


decorating · home repairs · house

What I did on my winter break: bathroom repaint

Thanks for the advice on my pattern – the consensus seemed to be no contrasting panel, so I’m trying the high neckline without contrast.  I can always cut a contrasting panel if I change my mind!  I started it last night, and so far (knock on wood!) it’s going well.

Our bathroom has long been a work in progress.  When we moved in it was apparent that the previous owners had cared about having a nice shower, and not much else, thus this sink and light fixture:

The light fixture was homemade, probably from the remnants of the homemade trim:
526055_633735193233_1280387168_n
Yes, that is a 2×4, glued to a quarter round and a piece of tiny trim.  They also didn’t believe in priming, as you can see from the bubbled and peeling paint.  I repainted it (using primer this time!) and it’s better.   It’s still not great, because it’s very hard to clean in the gap, but I don’t have the cash at the moment for what I wanted (tile or wainscotting.)

Here is the color it was most recently:

The entire bathroom, including the door and door trim was painted pale flat yellow when we moved in.  I painted the door white, and the rest a pale blue (Martha Stewart for Valspar, discontinued.)  I never loved the paint color – it looked ok in sunlight, but dingy at night, and it didn’t match the purplish undertones in the stone shower.  It also developed steam marks almost immediately – the kind where it looks like the walls are weeping.  They were impossible to wash off, so I knew I needed to repaint in a paint specifically for bathrooms.

Here is the result:
New bathroom
This color is Iron Mountain from Benjamin Moore, the same color I used in my hallway.  I like Iron Mountain because it’s somewhere several colors at once – both an almost charcoal, a taupe brown, and a plum.  It’s also nice and dark, which I like better than bright colors for a bathroom.  I used Aura Bath and Spa paint, which is supposed to keep off some of the weeping (steam marks on the walls) that I had with the cheaper paint.  We will see – I’ve banished all towels from the bathroom and plan to shower with the door open from now on.  We don’t have an exhaust fan, and with this being a second floor (out of 3) bathroom, we can’t really install one.  I thought of having one installed out the wall, but I want to see if I can solve the problem another way first.  I’ll try opening the window as well after a shower – that’s the reason why it’s up to code, because if you have a bathroom you aren’t required to have a fan.

I bought new rugs:
Picture 877

All the bathroom rugs now seem to be made of memory foam, and I don’t like them.  We had a set of those, and they were impossible to keep clean and nice looking.  These rugs are nice and soft, and without a rubber backing they can go through the wash.
I need something for the walls, so the room isn’t finished, but I feel much better about it now.  On to the sewing room!  I managed to pawn the bed off on one of my friends, so now I can get started.

crafts · decorating · home repairs · house · Sewing

Guest room to sewing room?

Welcome to 2013, you guys!  I spent the rest of my break working on my bathroom and relaxing.  The new semester starts tomorrow, so it’s back to work.  I had, all things considered, a pretty great holiday.

As always, when I have time to think I have time to plan, and I came up with a new scheme:

I’m seriously considering turning my guest room into a sewing room.  We have lived here 4 years and had overnight guests only a handful of times.  To be totally honest, I don’t enjoy entertaining overnight.  I’m introverted, and my house is my refuge – having people stay with me makes me super nervous (I feel like a jerk saying that, but I feel the same way when staying in someone else’s house myself – give me a hotel room any day!)  We can get a nice air mattress for when it’s needed.  My family and friends live in town (except my best friend, but she’s allergic to my cats and can’t stay!) and Marc’s family generally only do day visits.

My current sewing room is on the 3rd floor, which isn’t ideal.   Right now it’s so cold that I really can’t stand to sew, and in the summer it gets pretty hot.   It shares with my exercise equipment and my husband’s Lego collection, so it’s always cluttered.  I can’t control my husband’s clutter (and really, it’s his hobby, why should he have to?) but I do find that being in a messy room makes me stressed out and not at all creative.

I can take over the bedroom entirely, so long as I don’t mind giving up a closet (I don’t!)  I can’t make it dual purpose because it’s not big enough – the bed takes up a good portion of the room.  It’s not super big – roughly 10 feet x 12 feet.  I’ll leave my fabric storage upstairs, so I only need room for my machines, ironing board, and cutting table.  I have a Sullivan’s cutting table, and I might buy the ironing cover for it – that way I only need one surface for both!

Here is the room when we moved in:

Guest room when we moved in

And here it is currently (not this bright in real life!)
Guest room now


I’ll change the wall color – not sure to what yet!

So here is my question: would anyone like to share their sewing rooms with me?  I’m especially interested in seeing what you can do with a small room, but anything is good.  I need some inspiration, and I’m not averse to buying new storage or furniture (we have an IKEA in driving distance.)  I have a nice sewing desk (from Ikea) and a cutting table  – one of the ones that folds up to a smaller size easily.  I have another sewing desk with my Singer which I would like to place in the room, as I don’t have space for it upstairs.  It still needs refinishing, which isn’t happening until the thaw – it’s living in my dining room right now!


crafts · decorating · fabric · house · Sewing

Curtains for me!

Today was not the best of days.  I had an audition, which never fails to freak me out.  I don’t get stage fright, and I love to perform, it’s the being judged (a necessary part of an audition!) that never fails get to me.  Whenever someone comments on the arrogance of actors and musicians I usually say: A. You’re right and B: Seriously, it’s a coping mechanism.  It’s like a life full of never ending job interviews.

But eh… I’ll live.  To cheer myself up I went to my new favorite restaurant (Tom and Chee – an entire restaurant of grilled cheese sandwiches!)  Afterwards I was happy to find that my linen fabric samples had arrived:

I ordered these samples from fabrics-store.com.  They specialize in linen and they send free swatches on request.  The price was great for the quality.  I decided on plain linen for the large curtain in my living room, but I needed to pick a color.  I decided on the middle color above, which is called simply “natural.”  The other shades are (right to left) aluminum, bleached, natural, krista, and mix natural.  All swatches are the IL019 medium weight linen.  I’d consider the weight to be comprable to Kauffamn Essex linen.  It’s not heavy, but I think it will drape nicely for me (I am lining my curtains anyway!)  I had to order 8 yards to get the fullness I prefer (2x the width of the window).  You can see why I was trying to keep costs down!

I also ordered fabric from fabric.com to make simple tie top cafe curtains for my hall.


The pattern I’m using I found at Make it Love it (you can see their finished curtains in the photo  above).  The fabrics are by Michael Miller.  I love those charcoal and pink dala horses, called Wooden Horses,  to death!  They will be the main curtain, and the top/ties will be made of the wood block print behind, also by Michael miller.  I’m going to fully line these curtains.  Thank you for all the advice – I decided that I agreed making the long curtains from quilting cotton might not work, but it’s perfect for a small hallway window!

I’m starting to put the living room back together – I have a rug!

Leon the cat, as you can see, is helping to break it in by shedding furiously.  This is a flat woven cotton rug from Ikea.  I  am planning to paint a design on this rug using fabric medium – I like the white, but it’s not practical around him.  I still don’t have anything else in the room, but I’m working on it!  This project has been intensive, but I’m so much happier already that it’s worth the stress.


crafts · house · Sewing

Do you sew for your home?

The first thing I ever sewed was a quilt:

(Yes, I promise it has a binding now!)

I now know how crazy I was, but it’s what I wanted to make.  So I sat down with my Viking Huskystar machine (which did not make it out of the ordeal alive,) a book on basic sewing techniques and a web tutorial, and I made this thing!  It took a few months, but you know what?  When I finished that quilt, I knew how to sew.  And that I needed a better sewing machine.  This is why I always ask beginners what they would like to make.  It’s like learning knitting – yes, I could set you up to make a simple garter stitch scarf, but if that’s not what you want you’ll go mad with boredom long before you finish.

After finishing my quilt I started making dresses and well… that was that.  In spite of the fact that I originally bought my machine to make curtains, the most I’ve done is a super utilitarian set of shades for the skylights in my third floor.

When I started my redecorating project this summer, one thing I knew I wanted was to sew my own things.  Storebought curtains are expensive and boring, which is the reason why my home only has roman shades and sheers from Ikea.  In addition, regular curtains and shades don’t fit my windows very well (I can use the ikea ones only in the extra long length without hemming, and all blinds/shades have to be custom.) I have a few questions for the more experienced among you:

1. Is it ever ok to use quilting cotton for curtains?  I love the prints, but I don’t use them for garments due to stiffness.  I’d imagine I’d need to line a curtain made of this fabric, but I’m planning to do that anyway.  I found mixed opinions when I went looking online.  My concern is that they might not drape well.

2. Do you have any sources for home decor fabric?  I have to shop online, and I’m not looking to pay crazy decorator prices.  I’ve ordered swatches from fabric.com (some Amy Butler home decor prints and a few Waverly and Robert Allen fabrics) but I’m open to ideas.  I find the idea overwhelming, as I have the worlds most giant windows.  We’re talking tons of fabric here!  Since I have to buy so much I don’t want to make a mistake.  I’d rather not pay more than $16 a yard.

3. Any favorite resources for sewing curtains or roman shades?  When I made the curtains for my skylights I winged it, but I’d rather these look nice.  I’d love to make pinch pleated curtains, as I think those look much nicer than plain gathered curtains.

In addition to the curtains, I’m planning to replace my blinds (different window) with a custom roman shade.  I found this tutorial which uses the innards of a cheap mini-blind to make them.  This is brilliant!  I remember my Mom making them once, and I’m pretty sure it involved the use of dowel rods and a lot of cursing.  I can reuse my blinds, which would be great.

In addition to the curtains and blinds, I’m sewing one other project.  I found this tutorial on the Moda Bakeshop (a great place if you like using the packs of pre-cut fabrics.)

It uses one jellyroll (skinny pre-cut strips,) some piping, and 2.5 yards for the back to make two floor pillows.  I think calling them floor pillows sounds much better than what they will no doubt be in my house – cat pillows!  And it’s a good think it makes two, because they will fight over a pillow for weeks.  I’m going to use Amy Butler’s new Cameo line of fabrics. I found them when I was looking at home dec, and I was very sad to realize they don’t come in a sateen.

I think it will go really well with my new green wall.  I’ll be waiting on my fabric.com order for awhile longer (they have been moving their warehouse) but I should have my jelly roll soon.

Update on the rest of my diy living room makeover:

This past weekend I replaced both the horrid ceiling fans in my living room.  This was an accomplishment, as one of them was hung over the open stairwell, and both were installed with a junction box that didn’t actually fit into the ceiling.  I replaced the junction box in both and changed the fixtures, trying not to look too hard at the wiring (our electrician assures me that it’s fine, but we do have some of that old cloth covered wiring – not knob and tube, just cloth covered, and it looks kind of scary!)

Here are the ceiling fans – from some past decade, they were noisy, leaked oil, and didn’t even come close to lighting up the room.

Ceiling fan #1 was replaced by my rehabbed chandelier.  Here is the before:

and the after:

It gives off more light than it appears in this photo.  I spray painted the chandelier glossy black.   The shades were replaced, and applied this faux mercury glass treatment to the glass.  I don’t know how obvious it is here, but they give off a pretty speckled light, like this only a bit less yellow:

The effect is very realistic.  I recommend that tutorial.  The key is to spray vinegar/water first, then the paint.  I sealed mine with heat resistant clear coat, and I use fluorescent bulbs which don’t get hot, and which don’t touch the shades, but I’m still not sure I’d do this around a candle.

The second fan was replaced with a basic track from Ikea.  I love it – you can see how nicely it lights up the wall (paint is Iron Mountain from benjamin moore, the color for my hallway) and it also makes the stairs easy to see.   Good lighting makes quite a difference!

I’m taking a break from dusty activities, so it will bit before more progress – hopefully I can figure out my fabrics in the meantime!

decorating · home repairs · house

I have a green wall!

Yes I do:

I love this color (Cabana green by Benjamin Moore).  It’s pretty both in the daytime and at night, and it’s bright without being fluorescent.    I also chose the color for the other walls:

It’s Revere Pewter, also by Benjamin Moore.  As you can probably tell from the difference in the green, it’s actually a little cooler than it appears above.  I decided to go with a grey-ish beige (greige!) because the cool silver wasn’t working with my brown sofa, but it’s not as yellow as my other choice (above, which looks good here, but looks dirty on the wall).  This gray has a slightly green base, and looks different in different lights.  It’s pretty light and neutral, which is different for me.

I’m not painting the doors or stairwell until after an audition I have in 2 weeks, because while I can handle regular (low voc) paint fine, the oil primer I prefer on the woodwork is a bit much, and I’d rather not be ill.  In the meantime, I’m going to work on other projects – choosing the fabrics for the pillows and curtains I’m sewing, and changing other fixtures.

Last year we replaced the chandelier in our dining room.  The old one was not to my taste at all:

I really don’t like brass.  I replaced it with a chrome and white fixture that goes well with the cobalt paint, but I kept this one around for a redo.  It used to have really awful frosted glass shades with weird raised images of fruit on them, but I got rid of those – they weren’t working for me at all.  I was resigned to buying clip on shades when I found these at Goodwill for $4:

They aren’t setting the world on fire or anything, but they fit.  I’m thinking of using a faux mercury glass technique (here) on the outside of the glass, but I’ll wait until the fixture goes up this weekend.

In the meantime, I’m painting the chandelier itself:

Plain black gloss paint.  Here is what I use to paint metal:

I apply the liquid sandpaper with the gloves on.  This is important for metal because I think it’s hard to sand enough, especially if you have shiny brass.  You really want to knock the shine off!  I did three thin coats of the paint and then two lacquer.  I didn’t prime, but I would prime anything that is going to be handled at all with spray Killz.

I also have replacements for the other two fixtures – a flushmount for the hall to replace the awful bare bulb we’ve been living with, and a track for the stairs.

I don’t use the ceiling lights at all, but my husband does.  Hopefully with all those new lights (vs the three single bulbs we have now) it might actually be bright enough to see.  I’m keeping part of this old lamp:

My Mom gave me this lamp.  I like the interesting tree shaped base.  What I don’t like?  This:

I know, some people love these lamps.  I find that when you live in a victorian, people think you really need tiffany lamps.  I have five of them for some reason, and they just aren’t my thing.  This one isn’t fancy, so I won’t feel bad putting the shade in our yardsale and replacing the shade on the base.  We picked up a new shade last weekend here:

My husband wants to make it clear that he’s riding that cart like a crazy person.  Of course, I was taking pictures of him doing it, so that makes me just as crazy!  Where are we? That bright yellow wall can mean only mean this:

IKEA opened a store in Cincinnati a few years ago, and I’m not over the novelty yet.  I know, those of you in really big cities (or Europe) are over it, but trust me… before this there were no inexpensive places with good design.  I like to thrift, but there are some things you need to buy new.  My budget for this makeover is really low, so I knew a trip to IKEA was in order.

I picked up a plain cotton area rug (Erslev)in a large size to paint, a new floor lamp,  the track lighting, and a few odds and ends.    Oh, and I bought their panel curtain system to use as a fourth wall in front of the stairs – I want the living room to feel more like a room!  I thought their curtain choices were cheap though, so I bought the hardware and decided to make my own.

Tomorrow I’ll post about the actual sewing I’m about to do.  I have new curtains, pillows, room divider panels, and an area rug to paint.    Yes, still a lot, but I’m really pleased with how the room is shaping up – maybe I’ll finally have a living room I enjoy spending time in!

home repairs · house

Still here!

No, I haven’t disappeared – I’ve just been down the home improvement well again!  Sometimes I’m guilty of not wanting to post when I’m not sewing (there is going to be sewing in this project, of course, but I’m not there yet!)  We’ve finished the trim in the living room.  We are not done – oh no!  I’m pretty busy actually, as I’ve got a new, exciting job, and I’m also going to be going to graduate school soon.  More about that later, I promise, when I feel like I can share more.  In the meantime, let’s talk paint!

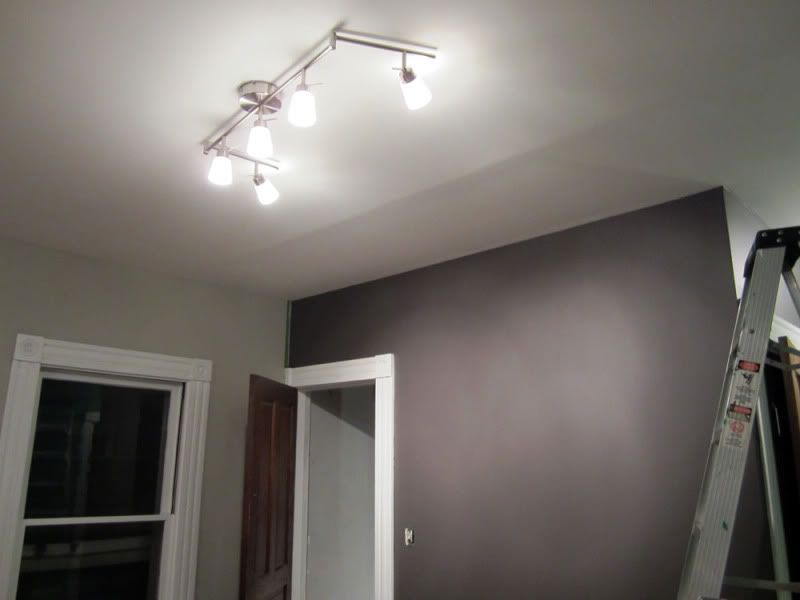
The trim was in terrible condition, and it took two coats of oil based primer (zinsser cover stain) and two of latex enamel to patch and cover to my satisfaction – this in addition to all the patches I made (between coats of primer) and acres of caulk (the room had none – explains our heating bills!)  It was worth it though – I love the bright trim, and I know it will look even better when the walls and doors are painted.  It looks kind of off in these photos, but that’s because I didn’t edge the top as I was painting the walls anyway.

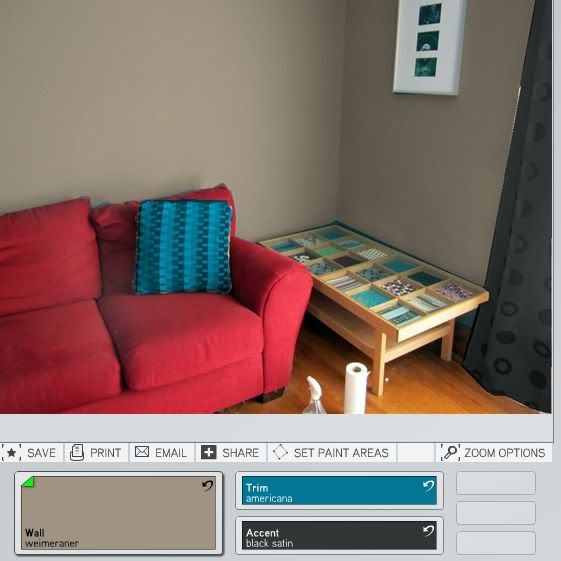
Let’s talk color: it’s both my favorite bit, and also the most frustrating part of this room.  I painted it twice before settling on this color last time.  This time I’ve decided to ditch the red sofa and sell it on Craigslist, which gives me more options!  My remaining sofa is dark brown leather, but I’m not married to it (my husband might be though…)  I am planning to buy a chair or two in the future.  My other furniture is mostly going to be new to me, as I’ve developed a craigslist/ikea problem lately.  Hey – it’s cheap, and I enjoy making over old pieces!

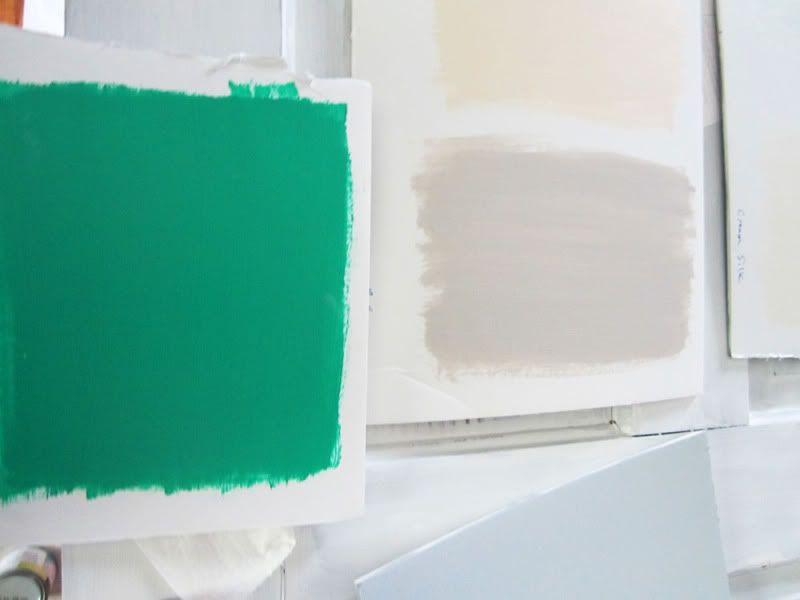
Here is the main color I’m chosen: Cabana Green by Benjamin Moore

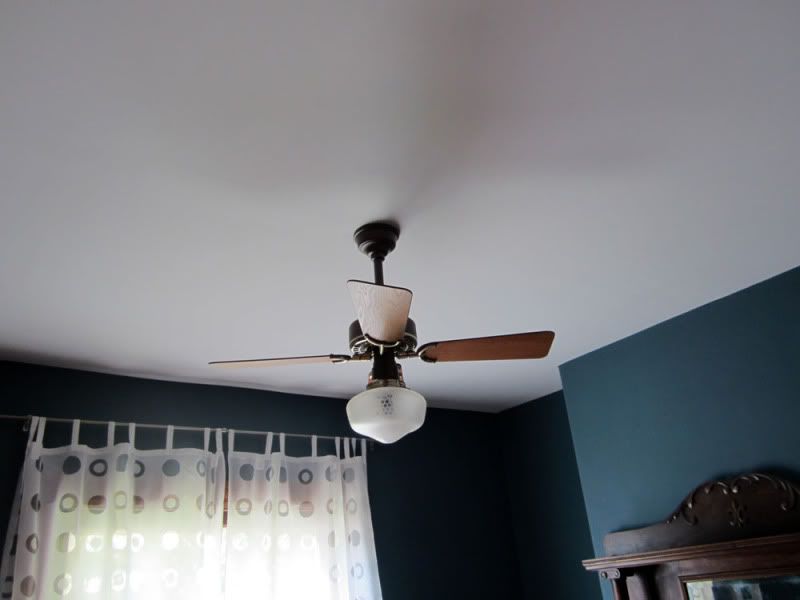
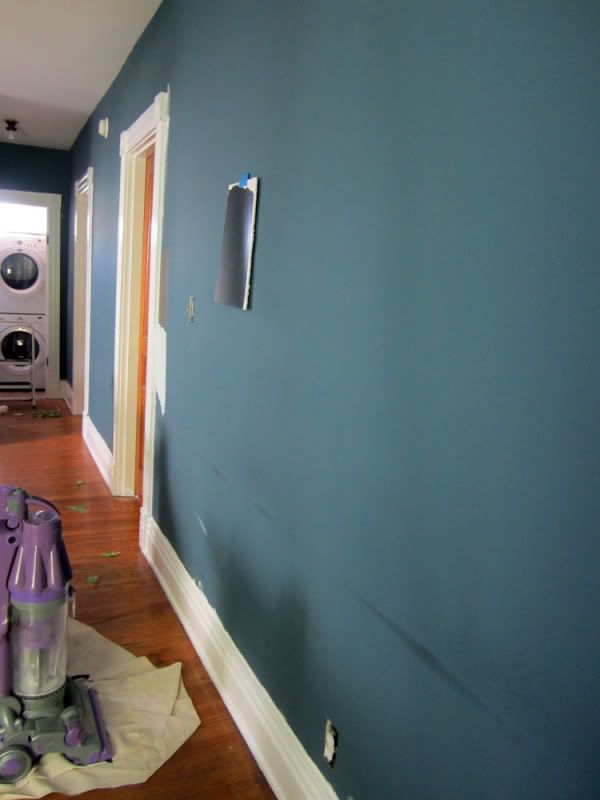
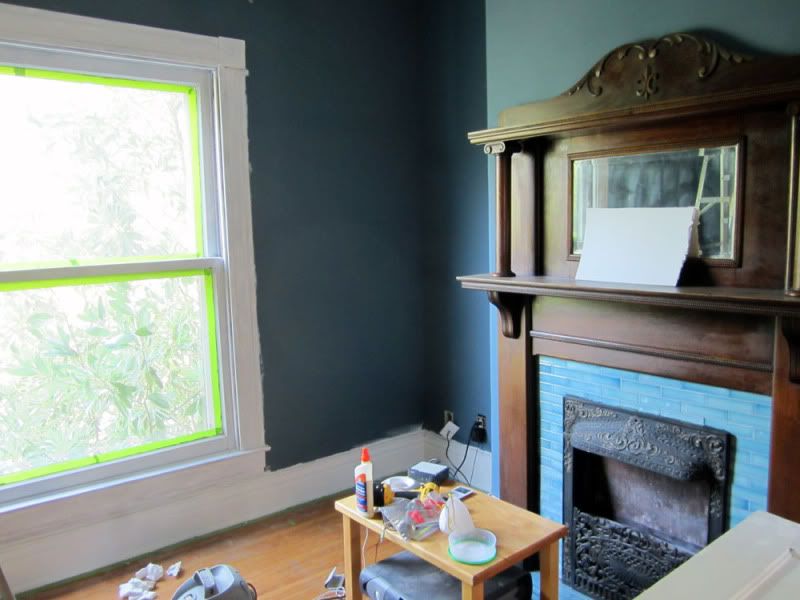
This photo doesn’t properly convey how great this color is.  It’s somewhere between a kelly green and turquoise (but closer to green!)  It’s fresh and springy and I love it.  It looked crazy on the card, but in the room it’s not bright at all.  The large (6’x9′) window in this room faces north, so the light tends to dim bright colors.  The two colors I’m showing above it are (left to right) Marilyn’s Dress and Abalone, both by Benjamin Moore (they make the best paint!)  I love the silver, which is a little darker than it appears but not much.  It’s bright and light without being overpowering.  It might trend slightly blue, which is good because it has to go with the blue fireplace.  The other shade (abalone) looks ok, but it goes a little lavender on the wall.  I am not a fan.  Here is the palette with Marilyn’s dress:

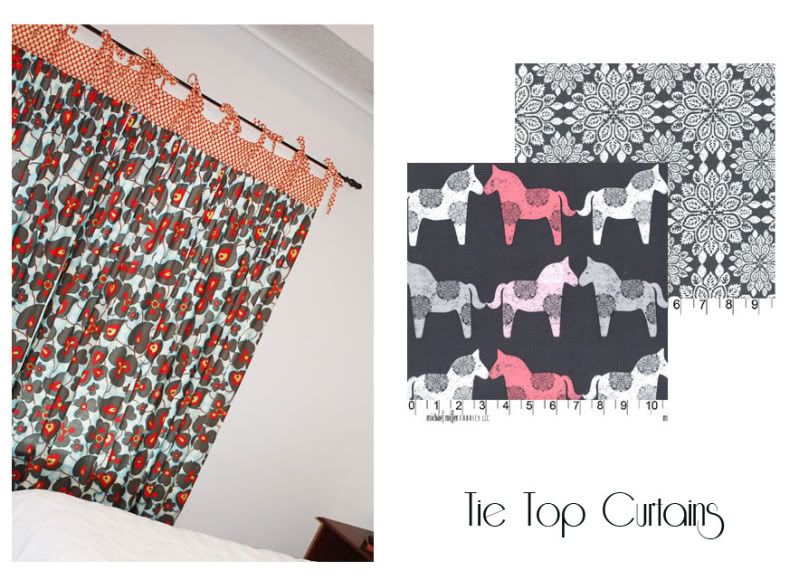
The navy is called “Old Navy,” also by Benjamin Moore.  It’s a very dark blue, but it doesn’t look black.  This palette is very preppy.  I would use coral and pink accents in my fabric – imagine a white and coral geometric rug!  My color inspiration is the Greenbriar Hotel, decorated by Dorothy Draper.  You really should go to the link and look at the photos!  It’s very 1940s, yes?  I will leave the really floral fabric out though… I ‘m not ready for that to come back.

The other possibility is to sub a warmer color (Benjamin Moore Cameo white, which is actually pale yellow,) for the silver:

Again with coral/pink/  I don’t think I like it quite as much, but it may work better in the room.  I’m waiting until after I paint the green to see.  Let me try to explain what I’m thinking:

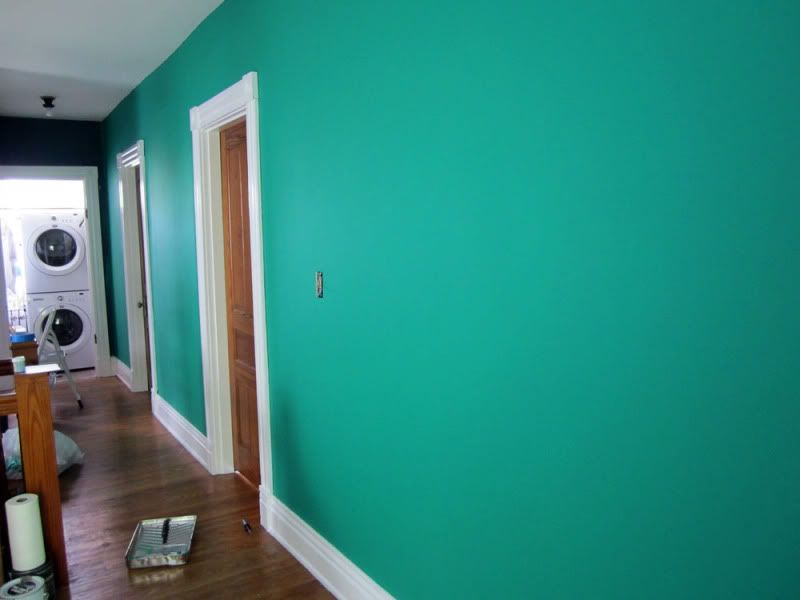
1. Paint the long shared wall green.

This area is essentially a loft.  I like the idea of using three different shades to break up the space, as last time I painted it all the same color and didn’t like the effect.  It’s not a normal room, so why treat it like one?  This wall is shared from the living room to the hall to the laundry area.  There is no break, and it’s 27 feet long.   This is the first thing you see coming up the stairs, which is usually recommended for accenting.  I’m ignoring the rule to accent the fireplace, since you can’t see it if you aren’t actually in the living room area.  And whoa, remind me not to put the sofa back on that wall – the poor cat, she has an oil problem!  I’m planning to do this bit tomorrow.

2. Paint the entire living room area the lightest shade. 

This will lighten up the space.  While part of the loft (the hall area) gets little light, the living room actually gets tons, and looks really great reflecting any of these shades.   The dark blue isn’t bad here, but it does make the space a little dark, with nothing for all that light to reflect off of!   Both  look nice in the room, but I’m waiting to decide until I paint the green wall, which may affect the quality of the light.

3. Paint the wall on the opposite side of the stairs the darkest shade.  Stencil an allover damask or tile pattern on this wall only, with either a gloss version of the navy paint (looks like wallpaper!) or a sheer metallic paint.

I know, three colors, but hear me out!  This wall is odd because, again, it’s an addition, added when they worked on the third floor and changed the stairs.  It’s not a full wall, and it’s shorter than the others.  As for the stencil… well, I’m just in the mood to do one, and that wall has always looked awfully bare to me.    And it would make a change from all the plain walls.   I can’t place a console table here like I want (too narrow) so this would be a way to make it less dull.

The stairs will have white spindles with the corner pieces black or dark brown.  The hand rail will also be black or dark brown.  The stairs, by the way, were the reason for starting this whole project, as they are an addition made of at least three different types of wood.

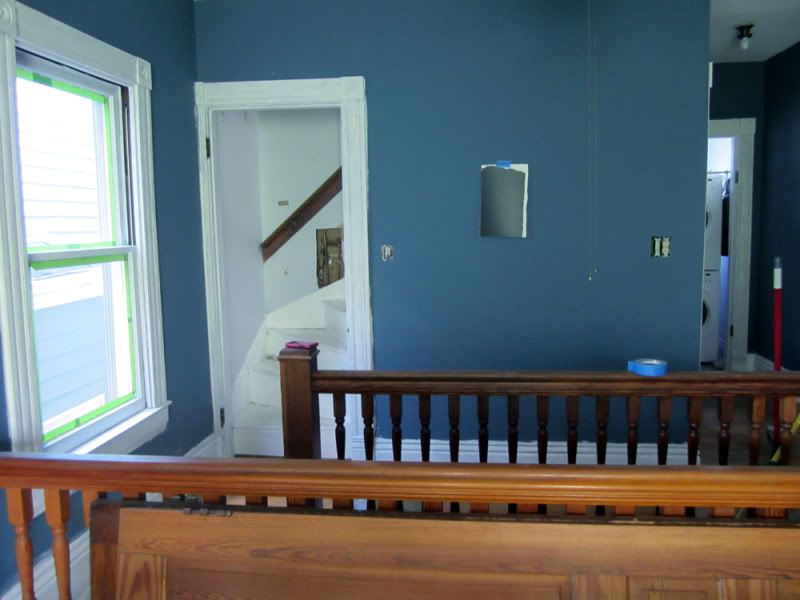
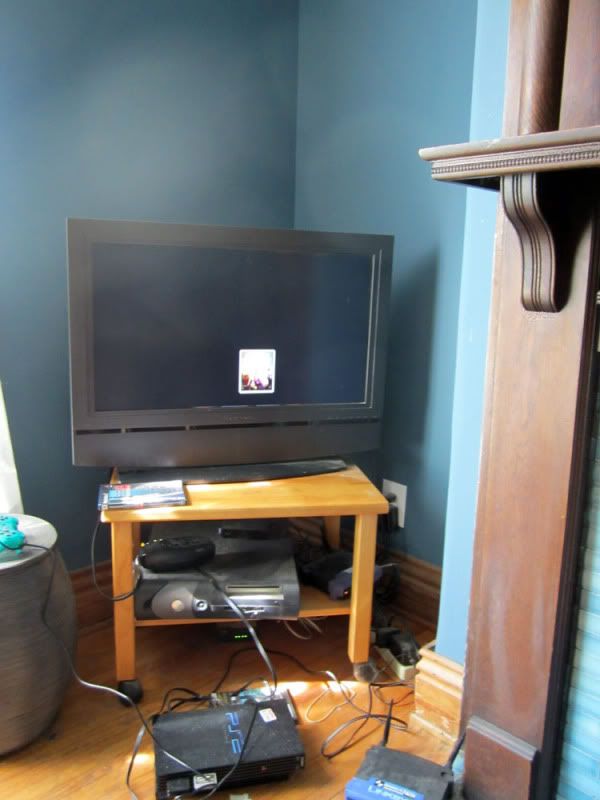
This is the part that it’s hard to understand.  Let me try: here is the view with my back to the big window you see above:

That window is 2 feet from the neighbor’s house and looks directly in.  I bet they’re enjoying watching my renovations!  I must remember to make a new shade…  Yes, there is usually a door there (to hide those stairs – we need to drywall where the plumbing access is!)    It’s an odd place for a door, and the wall itself is even shorter than the stair railing (look, at least two kinds of wood!)  I was considering leaving this natural, but the mismatch bothers me – the new wood (closer in this photo) is poor quality and orange.  At any rate, I doubt it was originally natural, as it appears all the trim/doors up here were painted.  There was originally a wall (making another bedroom) where the closer rail is today.

Seriously, I don’t know what they were thinking.  Admittedly, it’s why we bought the house, as it makes it possible to live upstairs and keep my business downstairs in the actual living room.  But it’s as though they read a textbook on how to destroy value.  “I know – let’s take the house from a respectable three bedrooms down to two!” “Cool!  Then let’s strip all the woodwork for no reason other than because we can, but fail to ever put any sort of protective finish on the exposed wood.  Then let it rot for 20 years in the sun!” “Great! And then let’s start renovating the third floor and quit after installing the expensive cooling systems and windows, but before installing walls, so we can’t claim the square footage when we sell!”

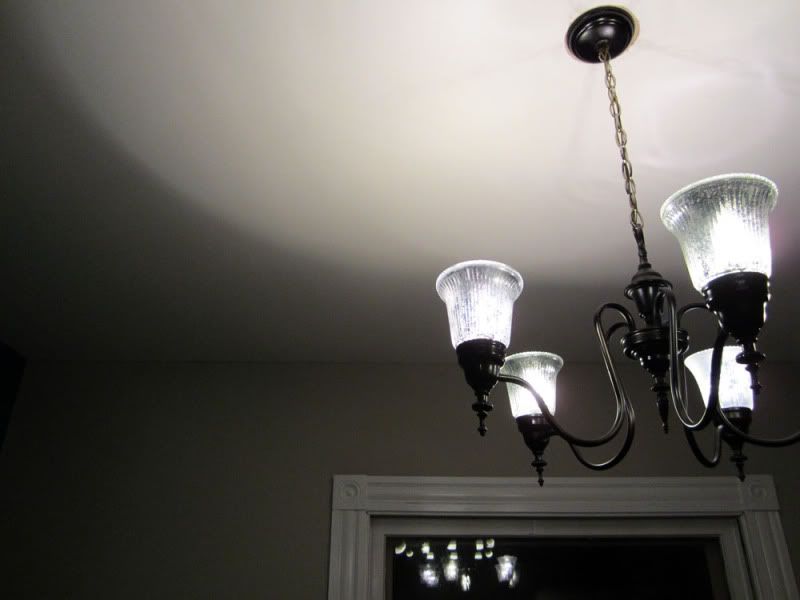
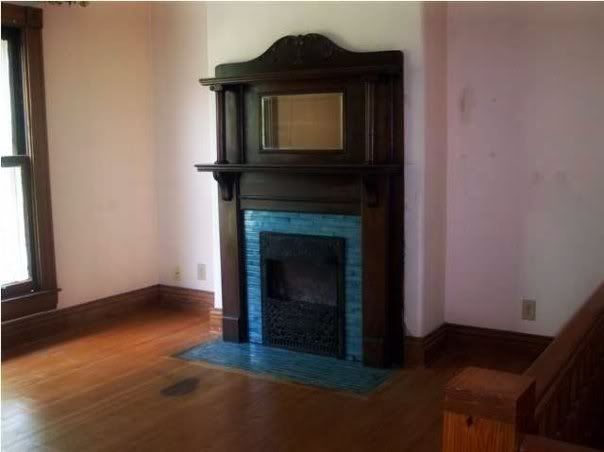
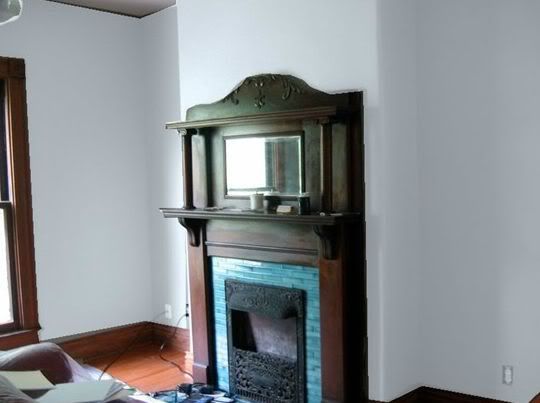
It’s good for us though.  This house showed horribly, sat on the market for a year, and finally sold to us for 1/4 less than they wanted.  We added walls and gained 400 square feet and another bedroom.  But when we saw it?  Depressing and scary.  Full of wallpaper and weird heavy curtains and with seriously questionable paint colors for an owner who claimed to be an artist.  Here is the living room from that tour:

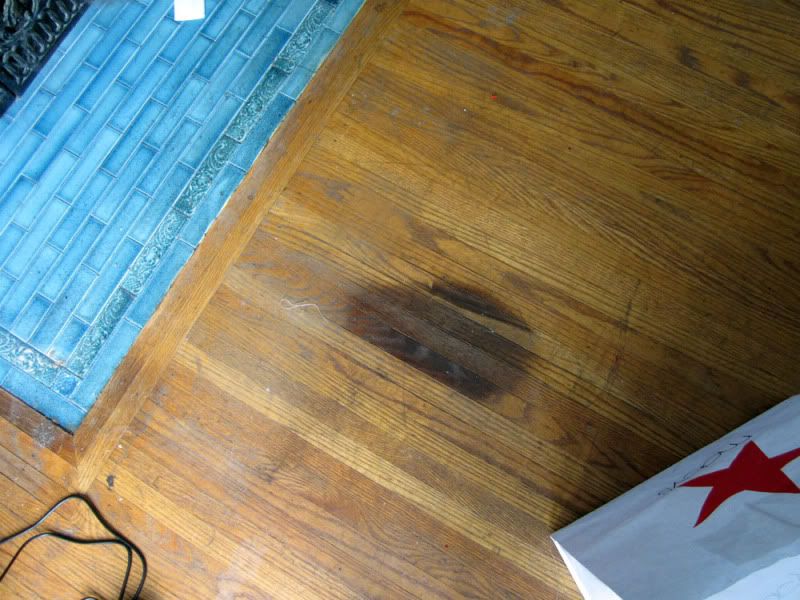
Yes, that’s stained pink.  It was also painted bright yellow on the other side of that railing, also stained.  Just for your eyes,  I cut out the 500 pound box valance over that window.  You can see it looming, like it wants to crush you (and it tried when we took it down!)  But don’t worry,when it seemed like we might not buy they helpfully painted it hospital green.  Yes.  And painted all the ceilings without a dropcloth.  Yes.  But I do think you can see in this photo how nice the fireplace looks with the lighter color, so let’s focus on that!  Not that mark in the floor – seriously, how do you burn a floor with a gas fireplace?  Were they roasting marshmellows?

I kid though.  I love this house.  It’s more than we should have been able to afford, so I thank the previous owners for their questionable choices!

Now, tomorrow I’m going to paint that wall.  I reserve to right to change my mind on this entire scheme and paint the whole thing green, but I don’t think so.  And besides, it’s only paint – if you aren’t carefully restoring trim it doesn’t take three weeks, I promise!

I’ll try not to disappear again, even if I am returning only to natter over choices for the curtains I’m going to sew (minus the 500 pound valance, which is currently in the back yard weighing down a tarp trying to kill the poor planting choices of the old owners.  Seriously, never plant lemon balm or mint.  You will regret it forever.  Our entire lawn is now made of herbs, and it smells like a mojito when you mow.)  Currently it’s too hot to be in my sewing room anyway – we’ve had record highs, and we need our air conditioner serviced up there.  I am not motivated to sew when it’s ninety and I have to iron!

home repairs · house

Send help… I’m fallen down the decorating well

Yes, it has happened again.  It’s summer, so it must be time for me to take on some sort of ridiculous home improvement project!  My living room needs help.  It’s in a loft area, and doesn’t really function well.  In addition, it’s a victim of bad rennovations past: the woodwork is half old and half new, with the new being cheap stained pine.  The old isn’t much better – as in many victorian homes, my house originally had painted woodwork in the family areas (upstairs) and nice stained woodwork in the public rooms (downstairs).  The people who lived here before us didn’t apparently know about that, because they stripped the upstairs trim to match downstairs.  It isn’t nice – it’s mismatched and knotty.  It’s full of dings and dents.  It doesn’t match the new trim in style or color, and it doesn’t match the downstairs wood at all.   I’ve decided to bring the house back to its original state and paint the second floor trim.  It’s taken me a long time to make that decision because I come from a long line of carpenters, and it’s practically written into my DNA to not paint over nice wood!  (Keyword there: nice).  My father, a professional in old home restoration, agrees with my assessment.  To be clear, I would never touch the woodwork downstairs, and I’m not painting the nice wooden mantels we have upstairs.  I am painting the windows because they basically are down to bare wood.  They need to be replaced, but we can’t afford that right now, so I’m trying to stave off deterioration.

Painting the trim and doors will be a lot of work, but I love painting and doing house projects.  I’m going to use the opportunity to repaint all the rooms upstairs (they get heavy use, and I’m ready for a change anyway!)  At the same time, I want to redecorate one room at a time.  I’m starting with the living room!

I’m trying to choose a color scheme.  We have a red sofa, which I can’t change (I am not mentally ready for making slipcovers!) and a dark brown leather sofa.  I’m thinking of red and turquoise accents with neutral gray or taupe walls.  Here are some mockups I made:

Wall color: Benjamin Moore “Sweet Innocence”

This a pale silvery gray.  It’s the lightest color I’m considering.  This room does not get a ton of light under the best of circumstances, so it’s best to either go light to brighten or go dark to try for a cozy look.  I’ve had dark for 4 years, and I’m feeling like a lighter shade might be best.

Wall Color: Benjamin Moore “Weimeraner”

This is the color we used in the living room at our old house (to go with the red sofa.)  I’m not an enormous fan of beige, but this has a nice warmth.   It’s possible that with the dark brown sofa this may be too much brown – I want to avoid a heavy feel.

Wall Color: Benjamin Moore “Pewter”

Medium gray.  An option if #1 is too light.

The pillow and curtains are both colorized in the photo.  I plan to make new curtains and pillows (yes, home dec sewing – I hate it, but it must get done!)  It’s not necessary for every wall here to match – the room itself is a loft overlooking the stairwell.  It’s hard to explain, but it’s basically a big open space, with doors leading off to all the other rooms on the second floor.  There is also a blue fireplace, which will tie in with the color scheme:

Here it is with the pale silver paint.  Don’t worry, I am not painting any part of the mantle – only the surrounding baseboards, which are a notably different type of wood.

Once that’s done, I have a few more projects in the space.  We do not currently have a rug – the old one died and I never replaced it.  The floors need to be covered – check out this fireplace accident:

They need to be refinished, but I’m not ready yet (I’m doing the stairs first, later this summer).  I got some great inspiration online, and I’m going to try painting a flat woven rug from ikea:

Source: I heart organizing

Pretty, right?  It won’t be soft, but that’s ok – I don’t care about soft, I just want to cover the floors!

I also need a new media center.  Right now we have our tv, 2 video game systems, my husband’s server, and our Roku all shoved into a wheeled birchwood cart.  It’s not pretty:

Yes, this is embarrassing.  

I’m going to move the whole thing out of the corner to be right across from the sofa.  As for the stand?  It’s going away.  I want to turn an old dresser into an entertainment center.  My inspiration:

Source: Addicted 2 decorating

I’m pretty handy in general, and I’ve done plenty of refinishing (real refinishing, not painting, so this should be easier).

I also need to do something about the light fixtures:

Ugly fans

I’m not a ceiling fan hater, but I hate this one (there are actually two in this room because it’s so large.)  My husband loves them, so I don’t know what to do about them yet.  I’ve thought of painting them (great tutorial here) but quite frankly I’m not sure they are worth saving.  I might keep this one (the better of the two) and update the paint, but replace the other with a nice fixture.  These, from Dimples and Tangles,  look great:

Finally, I’m making light blocking liners for the window, and new, more solid curtains.  I want to be able to shut all the lights out to watch tv – right now it’s impossible in the daytime!

So… whew, that’s a lot of work.  I do like to take on projects in the summertime!  My husband helps, but this sort of project is mostly my thing.  I work at home, so I have time to get through lots of projects.  We cleared the room today – my piano waiting room now has two extra sofas in it for awhile!

crafts · decorating · house · knitting

Bathroom photos, and knitting toe up

The bathroom, other than needing a new rug and a light fixture (coming Friday) is finished, so I thought I would let you all see what we’ve done!  Just for reference, here are photos from when we moved it.

The shower is nice, if a bit shoddily installed, but the rest needed to be updated.  I am keeping the mirror you see up there, I’m fond of it for some reason and use it for putting myself together.

Here it is today, after replacing the sink, medicine cabinet and lights, and painting the walls and the door (previously it was yellow like the walls.)

Oops… need to clean that shower wall!  The floor (pergo) is staying for now, but needs to be replaced eventually with tile.

The sink and medicine cabinet were inexpensive, but fit our needs (fit into the corner where the old sink was, and have storage underneath, as there is no closet.  We’ve also installed things like that hand towel ring – there were no towel rods of any kind in the bathroom when we moved in (maybe they took them with?)

As I said, we have no bathroom cl0set, so it’s important to find space.  This odd little corner probably exists because the previous owners removed the bathtub and put in a shower.  I was using plastic storage carts here, but they were ugly.  My Mom bought this on clearance at Linens and things going out of business sale, but it didn’t fit her bathroom – so we get a nice new cabinet!  This is pretty much going to be mine… I’ll hang the pretty old mirror back up there and use it as a dressing table.

I am so pleased with the bathroom – it no longer feels old and strange to me!  The color, for reference, is Martha Stewart Blue Agave, from Valspar at Lowes.  I am vaguely allergic to this paint (we used it in our condo all over) but I was able to handle one small room, and it was inexpensive.  We got good coverage in only one coat.

Now for the knitting content of my post… I have taught myself a new trick!

Not only is that sock toe up, but it’s knit on two circulars!  I always thought using two circs would be hard and annoying, but as it turns out I love it – no contorting of the cable, which is what I hate about magic loop, and I didn’t find myself grabbing the wrong end at all.  It’s also less fiddly than trying to start toe up on DPNs (which I hate, thought I love my DPNs.)  Unfortunately, I only have one size 0 circular, so I had to rip this back (since one side of the sock is always on the same needles, the sizes must be the same.)  I think I may run out and pick up another size 0 addi – I prefer knitpicks, but somehow I don’t think it would be cheaper after I threw in all the things I might need “just in case” to my order.

I’m so proud of me – I may restart this sock, widdershins from Knity for the January Sockdown… I like this yarn fairly well, and it’s nice and self striping!

Amelia is nearly finished, and here is a photo to prove it.

I am once again proving that one piece knits aren’t faster for me, as I avoid picking it up for the endless rows I’m on now.  But soon it will be done, and I can move on to something nice, knit in pieces (I’m leaning towards the Blooming Cardigan right now, but we will see!)

home repairs · house · Life

Bathroom color dilemmas

We are in the process of replacing our terrible bathroom sink, and after that is over I will be replacing the medicine cabinet and light fixture, and finally painting the room a color other than awful butter yellow!  We are holding off on tiling the floor since we have to pay to fix our furnace (still not fixed… still cold, but at least it’s a little warmer today!)

The bathroom has an excessively large shower, but no bathtub.  The shower is some sort of gray stone, so the paint has to match that (you can see the color in the photo below.)

The new sink is white with a black cabinet, so no worries about matching that.  Here is another picture, this one away from the window.

This is actually a better look at the colors.  Thge one I’m leaning towards is called “Blue Agave,” and it’s 2nd from the righ above, 2nd from the left in the first photo.  I also like “Glass Green,” on the far right in the photo above, but I think it might be too minty in the sunlight (I hate mint green for some reason.)  I think the more purple one is too purple.

Any way you look at it, I’m so excited to get this room worked on –  we have been suffering for 6 months with a sink that only had hot OR cold water, never both at once, and which has the porcelain peeling away and stains that will never clean off.

See what I mean?  I cannot imagine why they put in the fancy shower but didn’t spend the money to replace this horrid thing (and then wanted top dollar for the house.)

I will have in progress photos in a week or so!